« Garmin nüvi 360 First Impressions | Main | Lessig Talk at 23C3 »
December 28, 2006
Geocaching with the Garmin nüvi
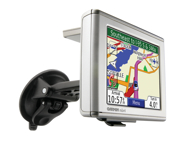 The hobby of geocaching came to my attention several months ago, however I was unable to actually try it out until I received the gift of a Garmin nüvi 360 GPS. For a full review of the nüvi, see my earlier post here. Also, you can view my profile and caches found on the geocaching website here.
First, let me address some of the issues others have encountered with geocaching using the nüvi. Many have cited the nüvi's lack of a compass in its interface, however a compass can be found on the satellite reception screen accessible by touching the signal bars in the upper-left corner of the home screen.
Also, it has been noted that the nüvi has a tendency to snap to nearby roads rather than recognizing that the user could be traveling off-road. This can be corrected by changing the vehicle type to "Pedestrian" and the route preference to "Off Road" in the navigation settings.
Now, the process of transferring geocaching waypoints to the nüvi can be extraordinarily simple, however for better results I have found a series of steps that works quite well. For your enjoyment, here is the simplest method...
Step 1: Download geocaching ".loc" files from geocaching.com.
Step 2: Use a program such as Mac SimpleGPS (for Mac) or GSAK (for Windows) to convert the ".loc" files and combine them into a GPX file.
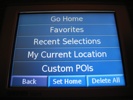
Step 3: Drag the GPX file into the Waypoints folder in the "Garmin" folder on the nüvi's removable drive (if there is no Waypoints folder, create one). Note: The nüvi can only hold a maximum of 500 waypoints.
Step 4: Disconnect and boot up your nüvi and your cache waypoints should be in the Favorites section.
Despite its relative simplicity, the above method has several shortcomings, notably that there is little to no information about the cache available on the nüvi itself, and that the caches are thrown into the waypoints section rather than the cleaner "Custom POIs" section.
The following is a step-by-step how-to detailing the best method I have found for adding geocaches to the nüvi's memory. This only works on Mac OS X and can take a great deal longer than the previous method.
 Step 1: Download geocaching ".loc" files from geocaching.com.
Step 2: Use Mac SimpleGPS to combine all of the ".loc" files into one GPX file. Save the GPX file somewhere safe.
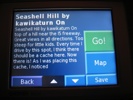
Step 3: Use Mac SimpleGPS to go through one at a time and edit the information for each cache in the GPX file. In the description field, add however much information you want in order to help you find the cache once you are in the field. I usually visit the cache's page on geocaching.com and copy the entire description that the person who hid the cache has posted. The nüvi is wonderful for this aspect of geocaching because there is no limit to the amount of information you can put in the description field, the nüvi will display it all on-screen and let you scroll through it.
Note: Step 3 can possibly be avoided by subscribing to a premium geocaching.com membership, however I have not been able to get the GPX files that the premium membership allows you to download to work completely with Mac SimpleGPS or any alternative on the Mac, although they appear to work quite well with several Windows geocaching programs.
 Step 4: Once your GPX file is edited and saved, download and open GPSBabel. Use the GPX file as your input file and choose input file type "GPX XML" and output file type "GPX XML."
Step 5: Under "Filters" hit the "Select..." button. In the window that pops up, check the option to "Generate smart shortnames." Click "OK" in this window, and then "Save File..." in the main window. Save the new GPX file and quit GPSBabel. The reason for using GPSBabel to make a GPX file out of a GPX file is because its "Generate smart shortnames" option causes the caches to be tagged with their actual names rather than "GCR2HK" or some other geocache ID, making searching caches on the nüvi much easier.
 Step 6: Download MakeGPI and drop your new GPSBabel-edited GPX file on the MakeGPI application's icon. Let MakeGPI process the file (this may take a while) and when it quits you will see a new ".gpi" file in the same directory as your GPX file.
Note: It appears MakeGPI has been updated into a full-fledged application (gpx2gpi). The link above should get you there, but just in case, here's gpx2gpi.
Step 7: Create a "POI" folder in the "Garmin" folder on the nüvi's drive if there isn't one already and drop your new ".gpi" file in that folder. It is always a good idea to keep a backup of your GPI file and especially your original GPX file (the one before using GPSBabel, because after processing with GPSBabel, Mac SimpleGPS can no longer edit the file).
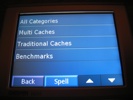
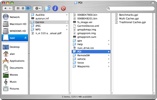 Step 8: Disconnect and boot up the nüvi. There should be a new option in "My Locations" under the "Where to?" menu called "Custom POIs." Inside here you will see a category for each GPI file you drop in the nüvi/Garmin/POI folder. Choose a category or the option for "All Categories" and you will see the nearest caches to you. Select a cache and the nüvi will display the full description that you entered earlier (or copied and pasted from the cache's website).
There is a slight bug in that the nüvi displays part of the cache description twice due to GPSBabel's processing technique, however it is not a major inconvenience. Just scroll down a bit on the cache's entry in the nüvi and you will see the entire description.
I hope you find this how-to article helpful, and have fun geocaching with the nüvi!
Posted by Alan Joyce at December 28, 2006 07:24 PM
Trackback Pings
TrackBack URL for this entry:
http://www.everythingdigital.org/cgi-bin/mt-tb.cgi/570
Comments
Step 3 ... is it the line endings (Mac vs. Windows)? I found this site when looking for data on uploading POI's to my nuvi ... one of the sites mentioned that the Garmin is a bit sensitive about this. It might be worht trying to reformat the file into Windows/DOS format by reformatting the line endings of the GPX file (perhaps by doing a 'save as' in TextWrangler or BBEdit) and having another go.
Thanks for the geocaching info.
D.
Posted by: fatshark at February 11, 2007 10:22 AM
Definitely something to try, I'll give it a shot.
Posted by: Alan Joyce at February 11, 2007 01:18 PM
Wow! I've been researching GPS and really wanted the nuvi 360 but also needed a geocaching device that works with OS X. You've put it all together in one place. Thanks for sharing!
Posted by: Ian at May 7, 2007 01:43 PM
Happy to help. Enjoy your nüvi when you get it!
Posted by: Alan Joyce at May 7, 2007 03:19 PM
My nuvi will ship this week! In preparation, I downloaded the above programs to find that none but gpx2gpl work on my Mac Pro. Darn bleeding-edge tech. So I searched versiontracker and found MacCaching, which read my Geocaching.com .loc files and let me export them to a .gpx file after editing. I couldn't use MacSimple GPS (An exception of class NilObjectException was no handled. The application must be shut down) to change the waypoint names, so I'll be stuck with those. But gpx2gpl appeared to work; at least, there's a new .gpl file waiting for upload to the nuvi when it arrives. More to come...
Posted by: Ian at May 19, 2007 07:56 PM